
Google Authenticator 是一款能讓我們接收雙重驗證(2FA)驗證碼的應用程式,例如我為我的 Google 帳號設定雙重驗證功能,那之後只要有不明裝置試圖登入我的 Google 帳號時,即使他輸入正確的帳號密碼,都還需要再輸入 Google Authenticator App 上的驗證碼才能成功登入,當然,對方無法得知你手機上的 Google Authenticator 所顯示的驗證碼是什麼,也就無法登入,達到保護帳號的用途。
在換新手機時,要記得將 Authenticator 驗證碼轉移至新手機,這樣我們才能在新手機上使用 Google Authenticator 來接收驗證碼,因此本篇教學會詳細教大家 Google Authenticator 換手機怎麼轉移與操作。

Google Authenticator 換手機轉移流程
將 Google Authenticator 驗證碼從舊手機轉移到新手機之前,請先確保以下條件都完成,然後參考下方教學的步驟一一操作,無論是 iOS 或 Android 都適用。
- 已下載 Google Authenticator App 的舊手機
- 已下載 Google Authenticator App 的新手機
- 新手機需連接網路
- 建議將 Google Authenticator App 更新至最新版
步驟一:從舊手機匯出 Google Authenticator 帳戶
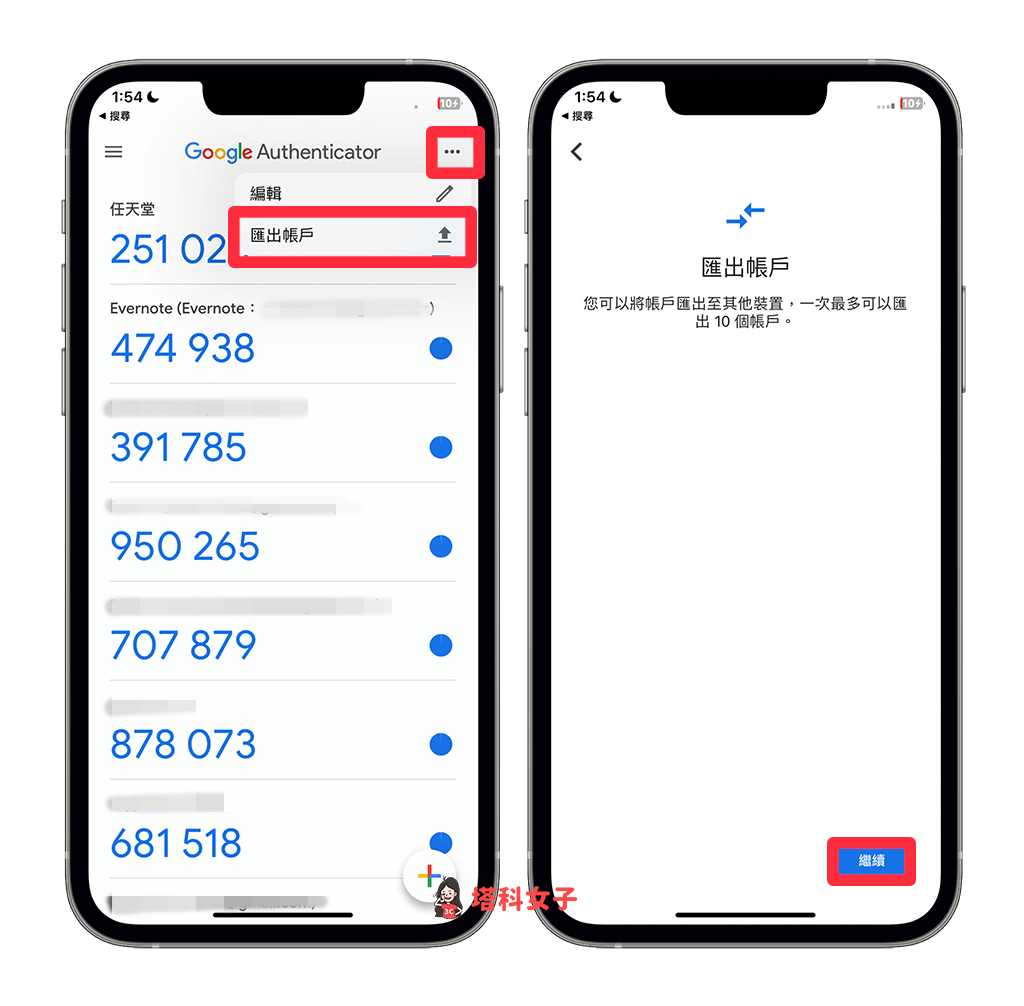
首先,請確保你的舊手機和新手機都已安裝最新版本的 Google Authenticator App,然後在舊手機上打開 Google Authenticator App,按一下右上角的「⋯」,選擇「匯出帳戶」,點選「繼續」。
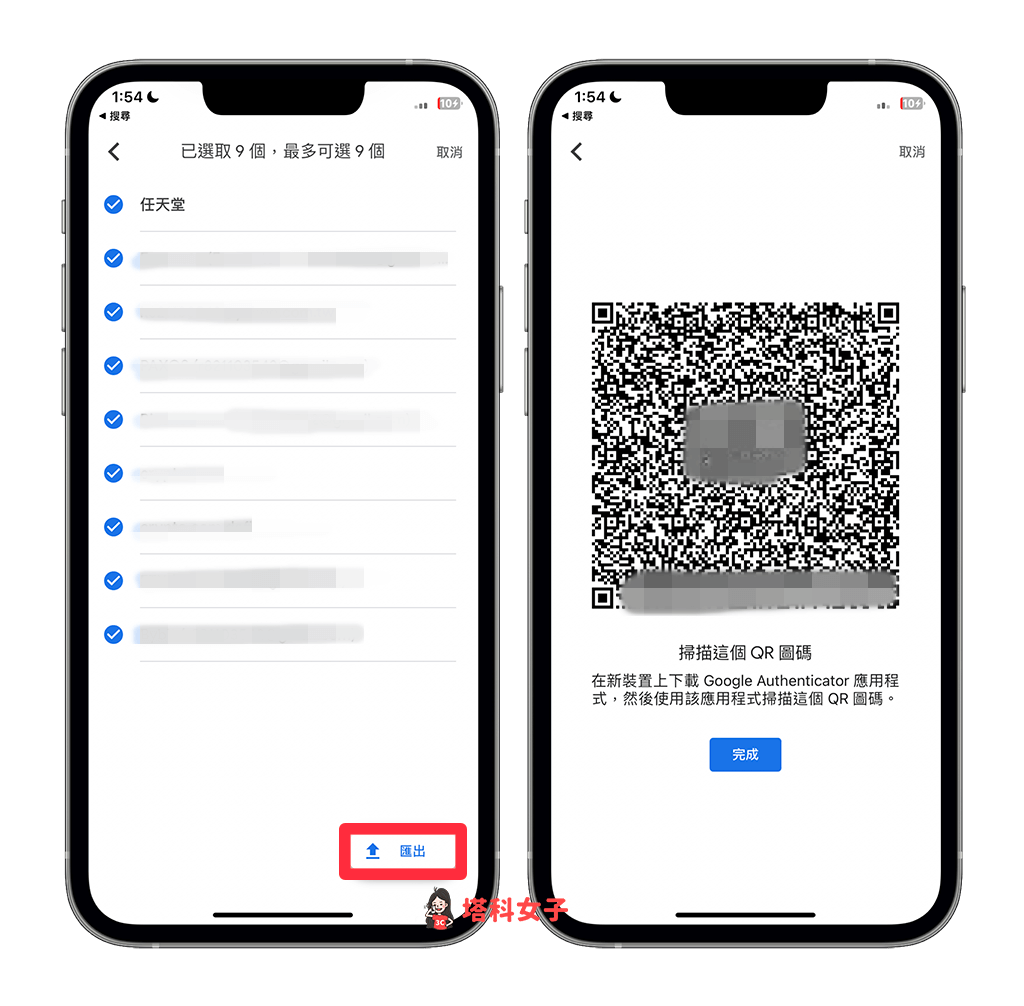
勾選想匯出的帳號,一次最多可以匯出 10 個帳戶,如果你在 Google Authenticator 上有設定超過 10 組雙重驗證的帳號,就需要多匯幾次即可。接著,讓舊手機停留在 QR Code 的掃描畫面。
步驟二:將 Google Authenticator 帳戶轉移至新手機
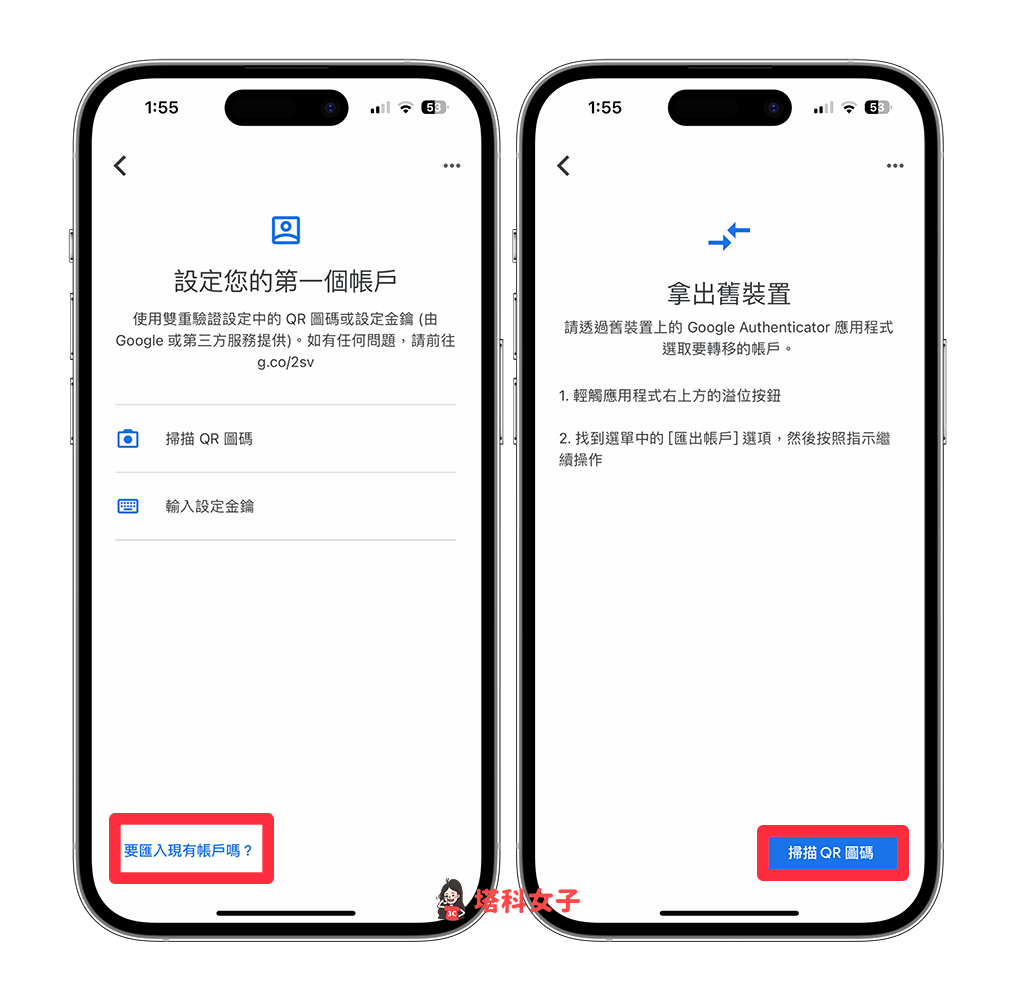
第二步,請開啟新手機的 Google Authenticator App,此時它會出現「設定您的第一個帳戶」畫面,因為我們要從舊手機轉移帳戶過來,所以請點選左下角「要匯入現有的帳戶嗎?」,然後選擇「掃描 QR 圖碼」。
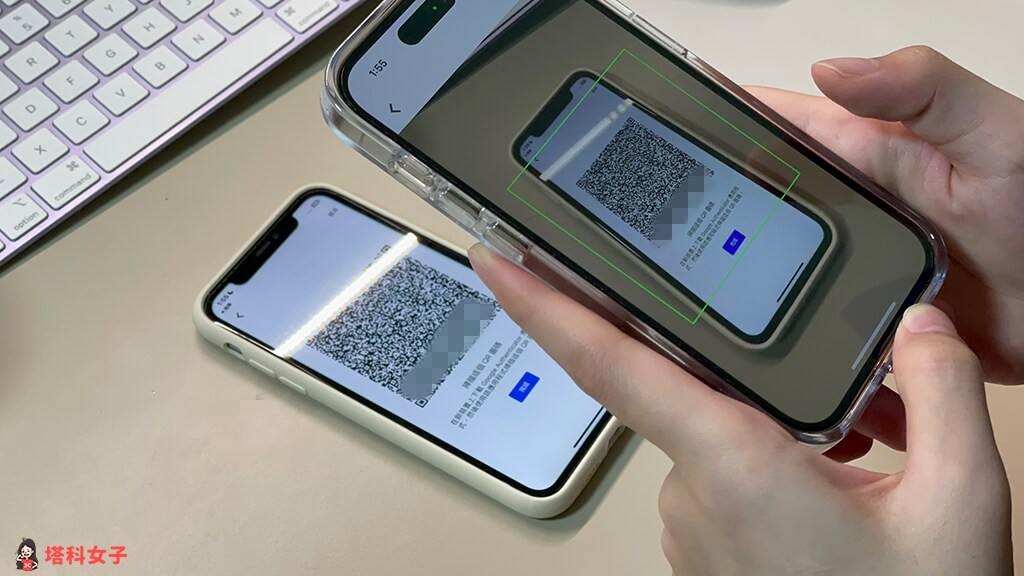
使用新手機掃描舊手機上的 QR Code 即可開始轉移 Google Authenticator 驗證碼帳戶。
步驟三:開始在新手機接收驗證碼
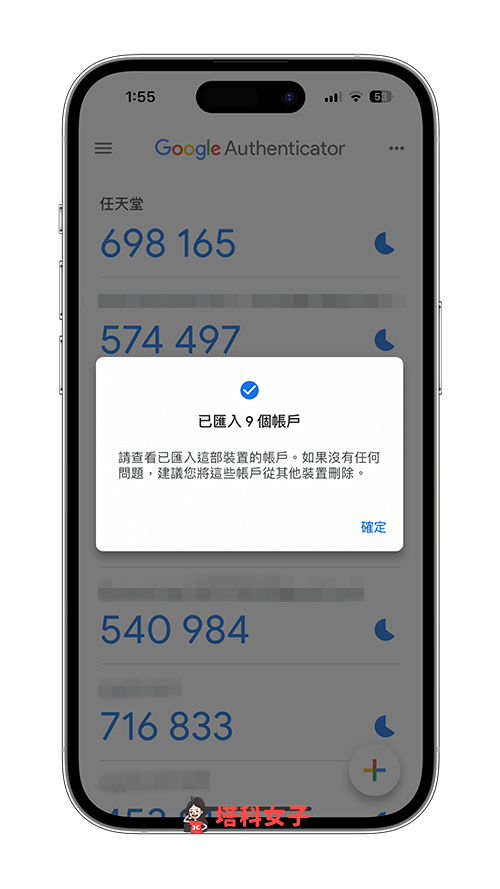
最後,我們的新手機上會顯示已成功匯入帳戶,之後我們就能直接在新手機上接收 Google Authenticator 雙重驗證的驗證碼囉!
總結
以上就是 Google Authenticator 換手機的轉移流程,不管你使用 iOS 或 Android,當你換新手機時,務必記得要將 Google Authenticator 上的帳戶從舊手機匯出並轉移到新手機上,整個步驟其實不難,只要在舊手機選擇想匯出的帳戶並讓新手機掃描 QR Code 即可轉移成功。
